Self-Storage Planning Tips for New Investors

Self-Storage Planning Tips for New Investors

Self-Storage Planning Tips for New Investors

Self-storage has become an attractive investment option because it offers steady demand, flexible business models, and opportunities for long-term growth. Population changes, smaller living spaces, and expanding small businesses continue to increase the need for secure storage across the country. Before investing in a facility, you need a clear understanding of planning, budgeting, and market conditions.

A successful self-storage investment starts long before construction begins. Every decision, from choosing a location to selecting the right building design, affects long-term profitability. Investors who prepare carefully can reduce costly surprises and create facilities that serve customers for years.

Why Does Self-Storage Continue to Attract Investors?

Self-storage remains popular because demand comes from many different customer groups. Homeowners use storage during moves or renovations. Businesses need extra space for inventory, equipment, and records. Contractors, retailers, and recreational vehicle owners also create consistent demand.

Unlike many commercial properties, self-storage facilities require fewer interior improvements between customers. That helps owners control maintenance costs while keeping units available for new rentals.

Many investors also appreciate the flexibility that comes with expanding a successful facility over time as market demand increases.

How Do You Evaluate a Self-Storage Market?

Every successful project begins with market research. Even an attractive property can struggle if the surrounding market already has enough storage space.

Study local population trends, housing growth, employment, and commercial development. Areas experiencing residential expansion often generate additional storage demand. Growing business districts may also support larger commercial storage needs.

Review competing facilities to understand:

  • Occupancy rates
  • Rental pricing
  • Unit sizes
  • Security features
  • Climate-controlled availability
  • Expansion opportunities

Strong research provides a realistic picture of future revenue potential.

Self-Storage Planning Tips for New Investors

What Makes a Good Site for a Self-Storage Facility?

Location affects both visibility and convenience. Customers prefer facilities that sit near major roads with simple access.

A quality site should provide enough land for current construction while leaving room for future expansion. Adequate vehicle circulation also improves customer satisfaction, especially for larger moving trucks and trailers.

Before purchasing land, investigate:

  • Local zoning requirements
  • Utility availability
  • Drainage conditions
  • Traffic patterns
  • Environmental restrictions

These factors can significantly affect construction schedules and development costs.

Why Should Investors Understand Local Regulations Early?

Many first-time investors underestimate the importance of local regulations. Every municipality has different zoning ordinances, permitting requirements, setbacks, and design standards.

Meet with local planning departments before finalizing property purchases. Early discussions often reveal potential issues before they become expensive delays.

You should also confirm building code requirements, fire protection standards, accessibility regulations, and stormwater management requirements.

Working with experienced professionals during the planning phase helps avoid unnecessary revisions later.

How Can You Choose the Right Facility Size?

Building too small can limit future revenue. Building too large can increase financing costs before occupancy grows.

Market research helps determine the right balance. Review nearby facilities to identify unit sizes that remain consistently occupied.

Many successful developments include a mix of:

  • Small personal storage units
  • Medium household storage units
  • Large commercial storage spaces
  • Vehicle or boat storage where appropriate

Offering several unit sizes allows facilities to serve a broader customer base while improving occupancy opportunities.

Why Does Building Design Matter?

Building design affects both customer experience and operating efficiency.

A thoughtful layout creates smooth traffic flow, simplifies navigation, and improves security. Wide drive aisles allow moving trucks to maneuver comfortably while reducing congestion.

Efficient layouts also maximize rentable square footage without sacrificing accessibility.

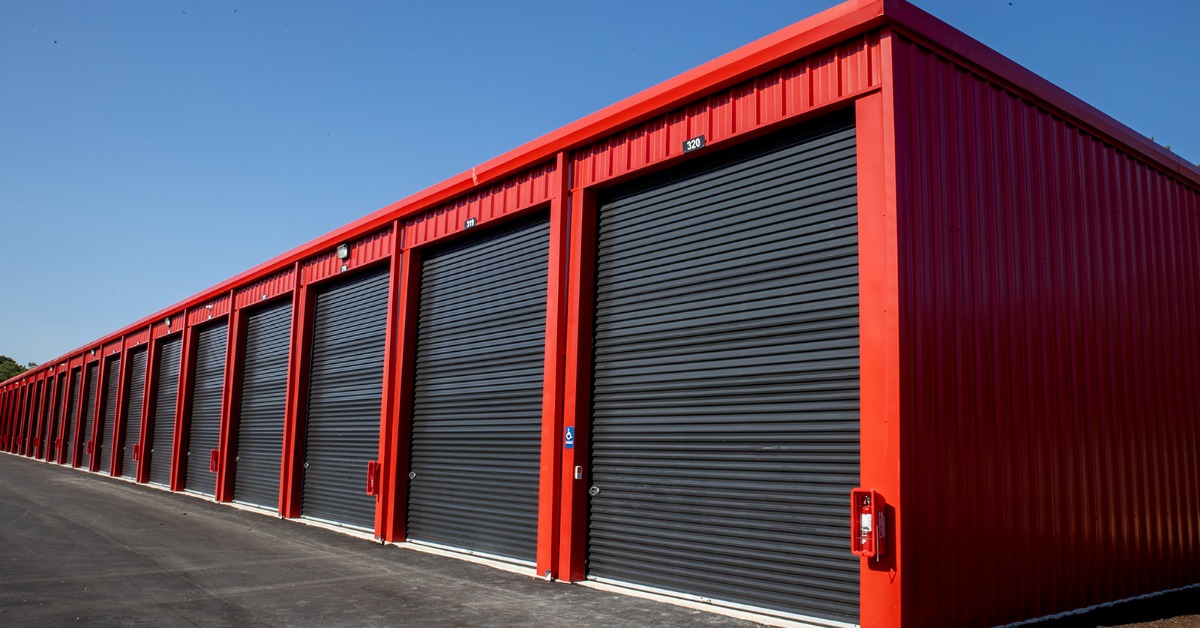
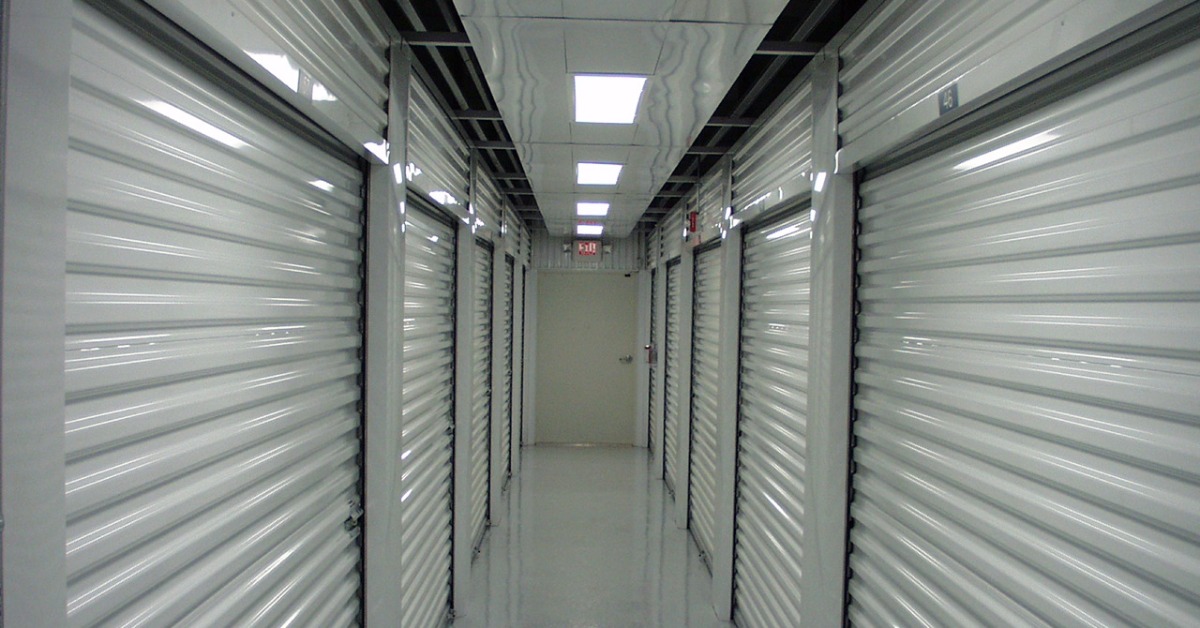
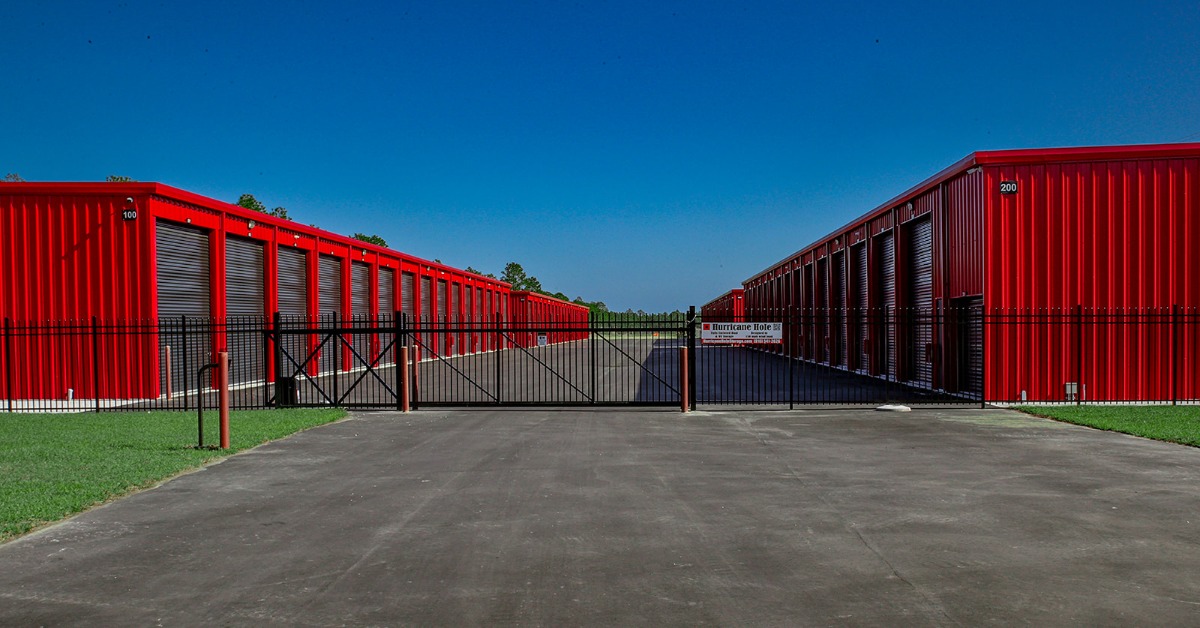
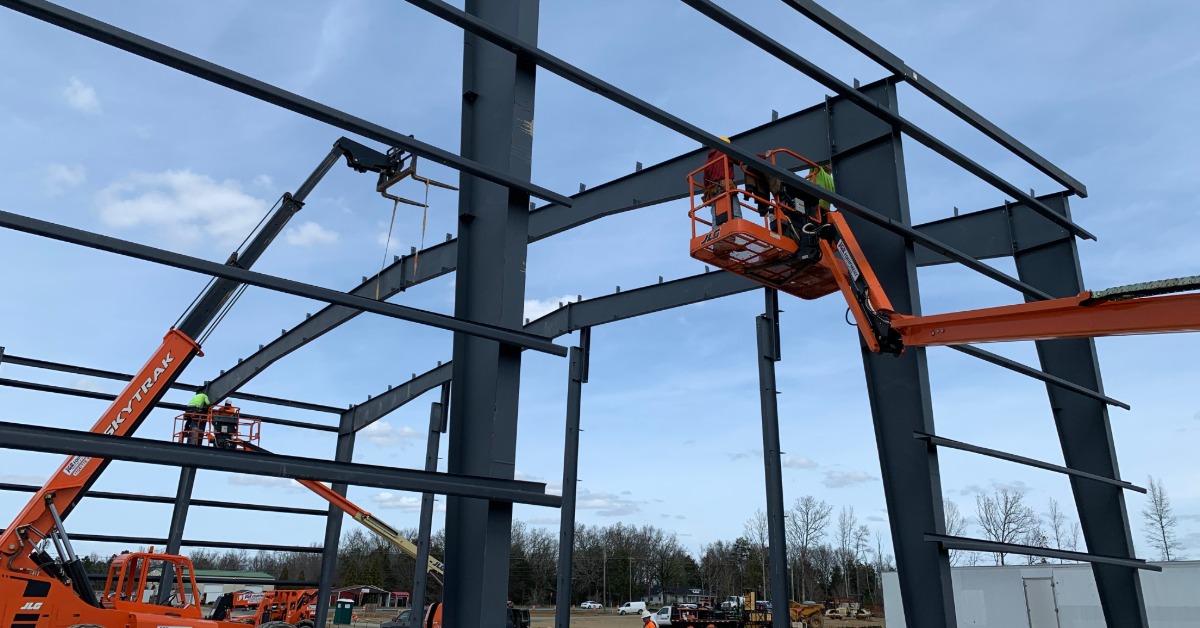
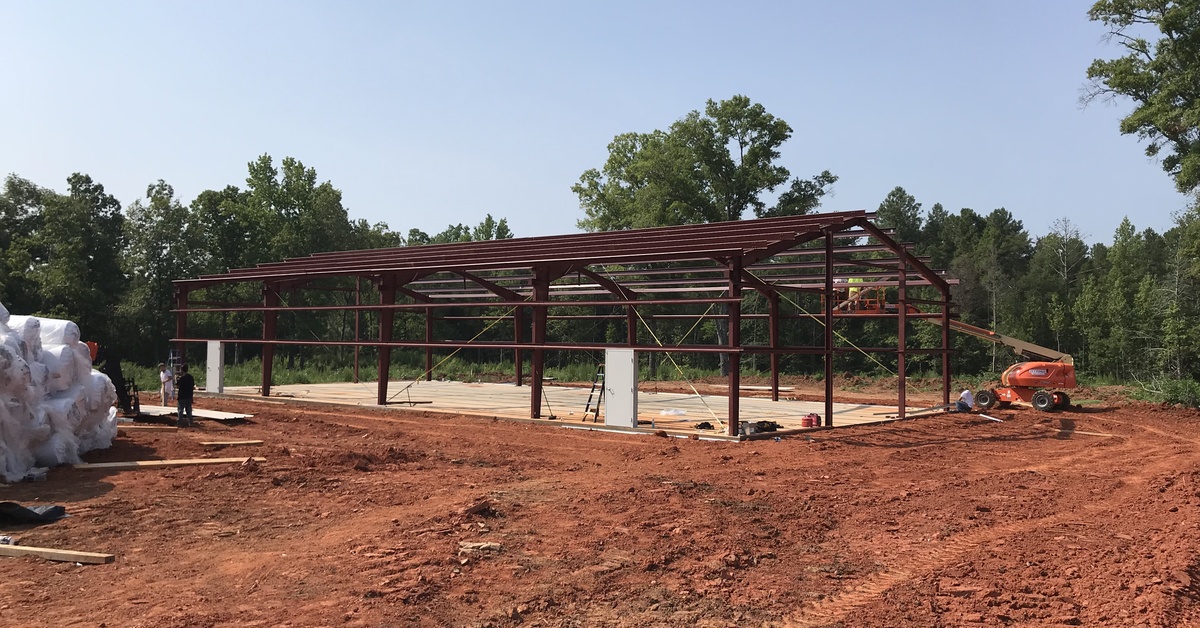
Many investors choose storage unit building kits because they provide flexible layouts that support future expansion while allowing efficient construction planning.

The building should also include durable exterior materials that perform well under local weather conditions and require minimal long-term maintenance.

What Security Features Should You Include?

Security remains one of the most important concerns for storage customers.

Modern facilities often combine multiple security systems to protect both customers and property. Strong security also improves customer confidence and supports long-term occupancy.

Common security features include gated access, perimeter fencing, surveillance cameras, keypad entry systems, and well-designed exterior lighting.

Managers should also maintain clear visibility throughout the property by minimizing blind spots and keeping landscaping under control.

How Do You Plan for Future Growth?

Many successful facilities expand over time rather than building every phase immediately.

If your property allows expansion, reserve enough land for additional buildings or new unit configurations. Expansion becomes much easier when site planning accounts for future development from the beginning.

Utility placement, stormwater systems, parking, and internal roadways should all support additional construction without requiring major redesigns.

Long-term planning gives investors greater flexibility as customer demand changes.

Why Does Construction Quality Affect Long-Term Returns?

Construction quality influences maintenance costs for decades.

Durable materials help reduce repairs while maintaining an attractive appearance for customers. Strong structural systems also provide dependable performance under varying weather conditions.

Investors should work with experienced suppliers that understand commercial building requirements and provide engineered systems designed for local building codes.

Quality construction often reduces operating expenses while protecting the property’s long-term value.

How Should You Budget Beyond Construction Costs?

Construction represents only one portion of the overall investment.

New investors should prepare detailed budgets that include permitting fees, engineering services, site preparation, utilities, insurance, marketing, financing expenses, and contingency funds.

Operating expenses continue after construction ends. Property taxes, maintenance, landscaping, security monitoring, software, staffing, and repairs all affect profitability.

A realistic financial plan helps investors avoid cash flow challenges during lease-up.

Self-Storage Planning Tips for New Investors

What Amenities Do Customers Value Most?

Easy access, clean facilities, convenient payment options, and dependable security remain top priorities for most renters.

Many facilities also benefit from features such as wide drive aisles, covered loading areas, quality lighting, online reservations, automatic payment systems, and clearly marked unit numbering.

Simple improvements that increase convenience often contribute to stronger customer retention.

How Can Marketing Support Occupancy?

Even an excellent facility requires consistent marketing.

Digital marketing plays a major role in attracting new renters. Accurate online listings, local search optimization, professional photography, and positive customer reviews all influence rental decisions.

Local partnerships can also increase visibility. Moving companies, apartment communities, real estate professionals, and contractors frequently interact with customers who need storage space.

Consistent branding across signage, websites, and advertising helps build recognition within the community.

Why Should Investors Work With Experienced Building Suppliers?

Developing a self-storage facility involves many moving parts.

Experienced building suppliers understand engineering requirements, project coordination, and building system options that support efficient construction. They can also help investors choose building configurations that align with operational goals and future expansion plans.

For companies such as Arco Building Systems, decades of experience supplying red-iron metal building systems allow investors to receive dependable building solutions backed by knowledgeable customer support. As a family-owned supplier serving customers nationwide since 1979, Arco focuses on providing high-quality building materials and personalized service throughout the planning process.

Choosing knowledgeable partners early often leads to smoother project execution from planning through construction.

Self-Storage for the Future

Self-storage continues to offer attractive opportunities for investors who approach development with careful planning and realistic expectations. Market research, location analysis, thoughtful facility design, quality construction, and long-term financial planning all contribute to stronger investment outcomes.

Rather than focusing only on initial construction costs, successful investors evaluate every stage of the project, from permitting through future expansion. Building flexibility into the design allows facilities to adapt as customer demand changes over time.

Working with experienced professionals like Arco Building Systems also helps reduce uncertainty throughout the development process. With careful preparation and informed decision-making, new investors can create self-storage facilities that provide lasting value for both customers and owners.

Planning a Flexible Layout for a Growing Church Building

Choosing Between Weld-Up or Bolt-Up Metal Buildings

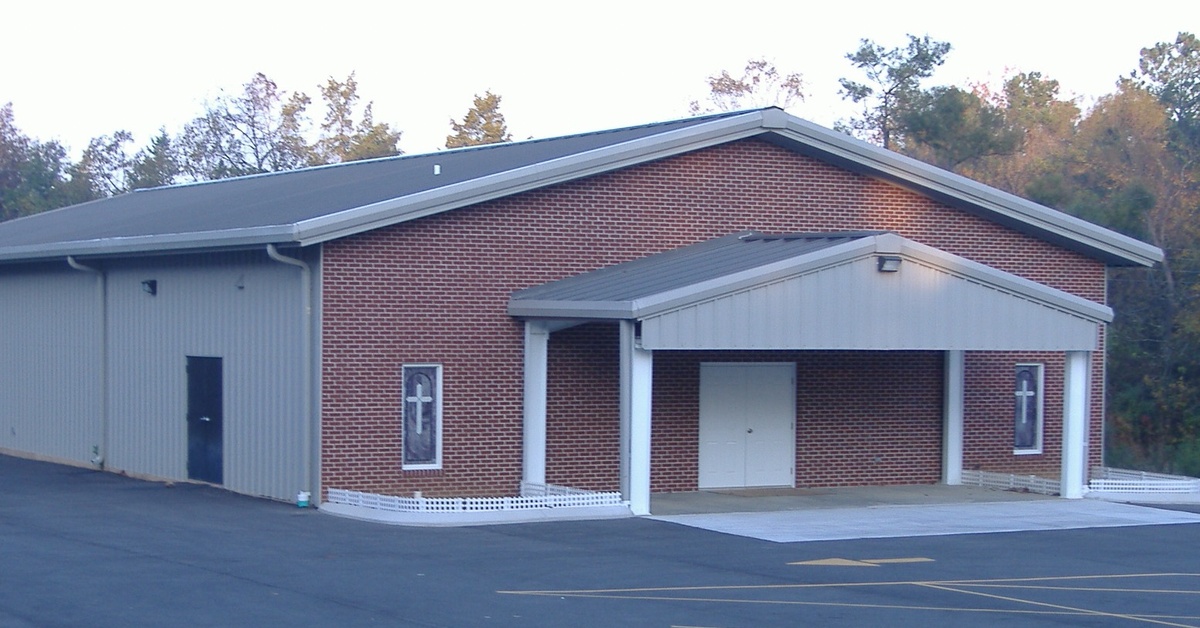
The exterior of a church building and an empty parking lot. There are small crosses on the windows of the church.

Church buildings serve more than one purpose. They host worship services, community outreach, youth programs, educational events, fellowship meals, and seasonal celebrations. As congregations grow and ministries expand, a building that adapts to changing needs offers lasting value and reduces the need for costly renovations.

A flexible layout allows church leaders to maximize every square foot while preparing for future growth. Careful planning creates spaces that support multiple activities without sacrificing comfort, function, or appearance. Whether a congregation plans a new facility or replaces an aging structure, thoughtful design decisions help the building serve members for decades.

Start With Your Church’s Long-Term Vision

Every successful building project begins with a clear understanding of future goals. Church leaders should evaluate not only current attendance but also expected growth over the next 10 to 20 years.

Consider questions such as:

  • Will children’s ministries expand?
  • Does the church expect to increase community outreach?
  • Could additional worship services become necessary?
  • Will new educational programs require classrooms?
  • Does the congregation plan to host weddings, conferences, or other events?

These answers influence the overall layout and prevent space limitations later.

Design a Multipurpose Worship Space

Many churches rely on their sanctuary for more than weekly services. A well-designed worship area can also accommodate concerts, conferences, holiday programs, and community gatherings.

Flexible seating arrangements often provide more versatility than permanently installed pews. Chairs allow staff to adjust seating capacity based on attendance while creating open floor space when necessary.

Adequate storage nearby keeps extra chairs, equipment, and staging materials organized and accessible.

Large open-span construction also eliminates unnecessary interior columns, creating better sightlines throughout the room.

Plan for Future Expansion

Growth often happens gradually rather than all at once. Planning for expansion during the initial design process saves time and money later.

An expandable building layout may include:

  • Space for future classroom additions
  • Areas reserved for larger fellowship halls
  • Utility systems sized for future capacity
  • Exterior wall locations designed for seamless additions

Many congregations appreciate that metal church buildings support expansion without requiring an entirely new facility. Additional sections often integrate with the existing structure while maintaining a consistent appearance.

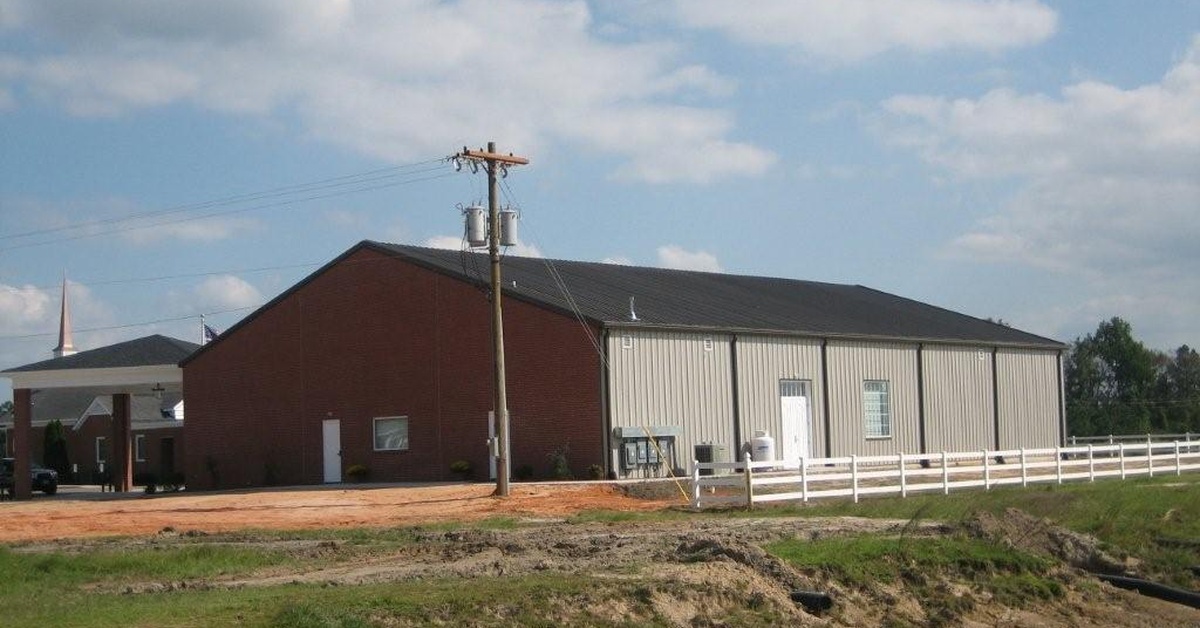
A metal church building seen from a distance. A small white picket fence surrounds the church building.

Create Classrooms That Serve Multiple Ministries

Church classrooms rarely support only one activity. Children’s Sunday School, Bible studies, leadership meetings, and community education programs frequently share the same rooms throughout the week.

Flexible classroom design includes movable furniture, durable finishes, and sufficient storage. Larger classrooms may also feature movable partition walls that divide one room into smaller teaching areas when needed.

Technology access, natural lighting, and comfortable acoustics improve usability for every age group.

Include a Fellowship Hall That Adapts Easily

The fellowship hall often becomes one of the busiest spaces inside a church. Members gather there after services, host banquets, organize fundraisers, conduct meetings, and welcome visitors.

Rather than designing the room for one specific purpose, create an open layout that accommodates changing furniture arrangements.

Wide entrances simplify equipment movement, while adjacent kitchen access improves food service during large events.

Storage rooms nearby keep tables, chairs, decorations, and supplies organized without occupying valuable floor space.

Make Children’s Areas Safe and Efficient

Growing churches often experience increased participation in children’s ministries before other departments expand. Designing these spaces carefully supports both safety and future growth.

Children’s areas should include:

  • Secure check-in locations
  • Age-appropriate classrooms
  • Restrooms located nearby
  • Controlled hallway access
  • Adequate storage for educational materials

Families also appreciate convenient parking access and easy navigation between children’s spaces and the main worship area.

Plan Offices That Support Ministry Growth

Administrative needs evolve as churches expand. Volunteer-led operations may eventually require additional staff members, pastors, ministry directors, or administrative assistants.

Office layouts should provide privacy while encouraging collaboration. Shared workspaces, conference rooms, and reception areas improve daily operations without consuming excessive square footage.

Planning extra office capacity during the initial design phase reduces future remodeling expenses.

Maximize Storage Throughout the Building

Storage often receives less attention than worship spaces or classrooms, yet insufficient storage creates daily frustrations.

Every ministry generates equipment, seasonal decorations, teaching materials, musical instruments, tables, chairs, cleaning supplies, and maintenance tools.

Instead of relying on one oversized storage room, distribute smaller storage areas throughout the building.

Convenient storage locations improve organization while reducing the time volunteers spend moving equipment across the facility.

Design Hallways for Traffic Flow

Churches experience dramatic changes in foot traffic throughout the week. Hallways that function well during Sunday services also improve movement during weekday programs.

Wide corridors reduce congestion before and after worship services.

Clear directional signage helps visitors locate classrooms, offices, restrooms, and gathering areas without confusion.

Natural lighting and attractive finishes also create a welcoming atmosphere that reflects the church’s hospitality.

Incorporate Technology Into the Building Layout

Technology continues to play an important role in modern ministry. Audio systems, projection equipment, livestreaming capabilities, security cameras, and wireless internet all require careful planning.

Rather than adding equipment after construction, include technology infrastructure early in the design process.

Planning ahead allows designers to conceal wiring, optimize equipment locations, and simplify future upgrades.

Dedicated equipment rooms also improve maintenance access while protecting valuable electronics.

Prioritize Accessibility for Every Visitor

An inclusive church welcomes people of every age and ability. Accessibility should influence every part of the floor plan rather than serving as an afterthought.

Accessible entrances, restrooms, seating areas, and parking create a comfortable experience for everyone.

Wide doorways, gradual ramps, and unobstructed pathways improve mobility throughout the building.

Thoughtful accessibility planning also benefits families with strollers, volunteers transporting equipment, and elderly members.

Balance Open Spaces With Private Areas

Successful church layouts combine large gathering areas with smaller rooms designed for counseling, prayer, leadership meetings, and ministry preparation.

Private spaces support confidential conversations while allowing larger ministries to operate nearby.

Separating noisy activity areas from quiet meeting rooms also improves comfort throughout the building.

Acoustic planning plays an important role in maintaining this balance.

Choose Durable Materials That Support Long-Term Use

Church buildings experience constant use from worship services, educational programs, community events, weddings, and outreach activities.

Selecting durable materials reduces maintenance costs while preserving the building’s appearance.

Flooring, wall finishes, roofing systems, and structural components should withstand years of regular use with minimal upkeep.

Pre-engineered steel building systems offer long service life while supporting spacious interior layouts that adapt as ministry needs change.

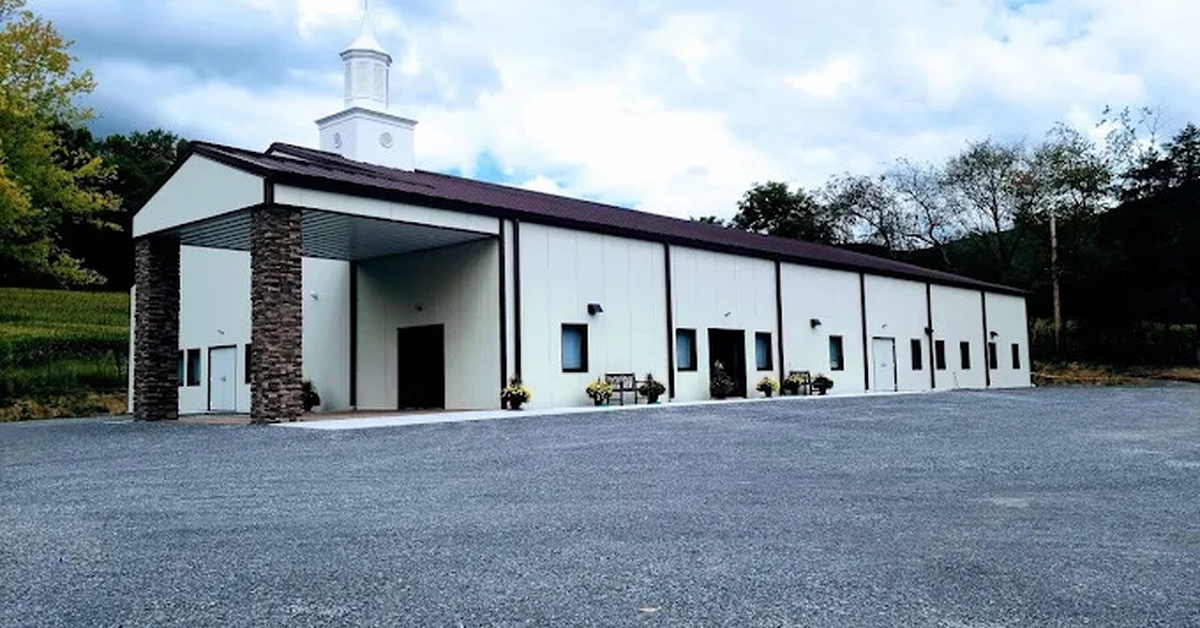
The outside of a church building. The entrance has stone pillars and the roof has a small steeple emerging from it.

Coordinate Parking and Outdoor Spaces

A flexible church campus extends beyond the building itself.

Parking lots should accommodate current attendance while leaving room for future expansion when possible.

Covered entrances improve visitor comfort during poor weather.

Outdoor gathering spaces create opportunities for fellowship events, seasonal celebrations, and community outreach.

Landscaping, sidewalks, lighting, and signage all contribute to a welcoming first impression.

Work With Experienced Building Professionals

Designing a church requires careful coordination between church leadership, architects, engineers, contractors, and building suppliers.

Experienced professionals help congregations evaluate structural options, building dimensions, future expansion opportunities, and local building requirements.

Early collaboration often identifies cost-saving opportunities while ensuring the finished facility supports long-term ministry goals.

For churches considering pre-engineered building systems, working with an experienced supplier like Arco Building Systems also helps ensure the building layout aligns with current needs while allowing future modifications when attendance grows.

Build for Today’s Ministry and Tomorrow’s Opportunities

A growing church benefits from a building that evolves alongside its congregation. Flexible layouts support worship, education, outreach, fellowship, and administration without requiring constant renovations.

Thoughtful planning creates spaces that remain useful as ministries change over time. By focusing on adaptable rooms, future expansion, efficient traffic flow, accessible design, and durable construction, church leaders can invest in a facility that continues serving both current members and future generations.

A well-planned church building does more than provide shelter. It creates an environment where ministry can grow, communities can gather, and congregations can pursue their mission with confidence for many years to come.

Choosing Between Weld-Up or Bolt-Up Metal Buildings

Choosing Between Weld-Up or Bolt-Up Metal Buildings

A prefabricated metal building positioned on a red clay surface. There are several small silos next to the building.

When planning a new metal building project, one of the first decisions involves selecting a construction method. Many buyers compare weld-up and bolt-up metal buildings because each option offers unique advantages for different applications.

The right choice depends on factors such as project size, budget, construction timeline, labor availability, and long-term building goals. Understanding how these systems differ can help you choose a solution that supports your needs while avoiding unnecessary costs or delays.

What Is a Weld-Up Metal Building?

A weld-up metal building consists of steel components that crews fabricate and weld together on the job site. Contractors typically purchase raw steel materials and cut, fit, and weld the structural members during construction.

This approach gives builders significant flexibility because they can customize many aspects of the structure as work progresses. Weld-up construction has existed for decades and remains common for specialized projects that require extensive customization.

However, weld-up buildings often require experienced welders, additional equipment, and more labor hours compared to pre-engineered alternatives.

What Is a Bolt-Up Metal Building?

A bolt-up metal building arrives with engineered components manufactured to precise specifications. Crews assemble the structure by bolting together pre-fabricated parts according to engineered drawings.

Most modern metal building kits use this method. Manufacturers design the structural framing, roof system, and wall system before production begins.

Because the components arrive ready for assembly, contractors spend less time making field modifications. This streamlined process helps many projects move from delivery to completion more efficiently.

How Does Construction Time Compare?

Construction speed often plays a major role when choosing between weld-up and bolt-up systems.

Weld-up buildings require substantial field fabrication. Contractors must measure, cut, align, and weld structural components throughout the project. Each step adds time and creates opportunities for delays caused by weather, labor shortages, or fabrication errors.

Bolt-up systems reduce much of that field work. Components arrive engineered and manufactured to fit together as designed. Crews focus primarily on assembly instead of fabrication.

For many commercial and industrial projects, faster construction translates into lower labor costs and earlier building occupancy.

Which Option Requires More Skilled Labor?

Weld-up construction depends heavily on skilled welders and experienced steel fabricators.

Finding qualified welders can prove challenging in some regions. Labor shortages may increase project costs and extend schedules. Weld quality also affects structural performance, making experienced personnel essential.

Bolt-up buildings generally require construction crews familiar with steel building assembly, but they eliminate most field welding requirements. Since manufacturers complete the welding process before shipment, installers focus on positioning and fastening components.

This advantage often makes bolt-up buildings more accessible in markets where skilled welding labor remains limited.

A metal building with an attached garage. The whole building's roof is covered with snow and the garage door is open.

How Do Costs Differ?

Cost comparisons depend on project specifications, local labor rates, and material pricing. However, bolt-up buildings frequently offer greater cost predictability.

Weld-up projects may encounter unexpected expenses related to labor, field modifications, equipment rentals, and material waste. Changes during construction can also increase costs.

Bolt-up systems typically arrive with engineered plans and predetermined material quantities. This level of planning helps owners estimate project expenses more accurately.

Although every project differs, many buyers appreciate the budget certainty associated with engineered metal building systems.

What About Engineering and Design?

Engineering plays an important role in modern metal building construction.

Weld-up buildings often rely on local engineers and contractors to determine structural requirements. Design flexibility remains a significant advantage, especially for unique architectural projects.

Bolt-up buildings use engineered systems designed specifically for the project’s dimensions, location, and loading requirements. Manufacturers account for factors such as wind loads, snow loads, and building use during the engineering process.

This approach helps ensure structural consistency while simplifying the design phase for many owners.

Which Building Type Offers Better Quality Control?

With weld-up construction, much of the fabrication occurs outdoors on the job site. Weather conditions, site limitations, and varying workmanship can influence the finished product.

Bolt-up systems benefit from factory-controlled manufacturing environments. Manufacturers use specialized equipment and standardized production processes to create structural components.

This consistency often results in tighter tolerances and more uniform construction quality across the entire building.

How Does Future Expansion Work?

Weld-up buildings can accommodate expansions, but modifications often require additional engineering and field fabrication. Contractors may need to cut, weld, and reinforce structural members during expansion work.

Bolt-up buildings also support future expansion. Many engineered systems incorporate expandable endwall designs that simplify building length extensions.

Businesses expecting future growth should discuss expansion plans during the initial design phase regardless of the construction method they choose.

Which Option Works Best for Commercial Applications?

Commercial projects frequently prioritize speed, efficiency, and predictable costs.

Retail spaces, warehouses, manufacturing facilities, and distribution centers often benefit from the advantages offered by bolt-up construction. Faster assembly and engineered designs help businesses bring facilities online sooner.

Many commercial developers choose bolt-up systems because they streamline project management and reduce construction complexity.

As demand for prefab metal buildings continues to grow, engineered bolt-up systems remain a popular choice throughout the commercial sector.

Are Weld-Up Buildings More Customizable?

Customization represents one of the strongest arguments for weld-up construction.

Builders can make field adjustments and accommodate unique layouts during the fabrication process. Projects with unusual dimensions, specialized structural requirements, or complex architectural elements may benefit from this flexibility.

However, modern bolt-up systems also offer substantial customization options. Buyers can select various building widths, lengths, heights, roof configurations, wall systems, colors, and accessories.

For many projects, engineered customization provides sufficient flexibility without sacrificing efficiency.

What Maintenance Considerations Should Owners Expect?

Long-term maintenance affects the overall value of any building investment.

Properly constructed weld-up and bolt-up buildings can both provide decades of reliable service. Maintenance requirements often depend more on material quality and installation practices than on the construction method itself.

Owners should regularly inspect:

  • Roof panels and fasteners
  • Sealants and weatherproofing systems
  • Gutters and drainage components
  • Doors and openings
  • Structural connections

Routine inspections help identify minor issues before they develop into costly repairs.

A large, 2-story metal building with a small crane parked out front. Text on the building reads "BLDG 3."

Which Building Method Supports Faster Project Planning?

Project planning often determines whether construction proceeds smoothly.

Weld-up projects may involve multiple vendors, fabricators, engineers, and contractors. Coordinating these parties can increase project complexity.

Bolt-up systems simplify many planning tasks because manufacturers provide engineered components designed to work together. Buyers receive detailed drawings, material packages, and clear installation requirements.

This coordinated approach helps reduce uncertainty throughout the construction process.

When Does a Weld-Up Building Make Sense?

A weld-up building may prove beneficial when:

  • The project requires extensive custom fabrication
  • Unique architectural features drive design decisions
  • Local welding expertise remains readily available
  • Construction schedules allow for longer fabrication timelines

These projects often prioritize flexibility over speed and standardization.

When Does a Bolt-Up Building Make Sense?

A bolt-up building often serves as the preferred solution when:

  • Fast construction matters
  • Budget predictability is important
  • Engineered performance requirements exist
  • Labor efficiency affects project costs
  • Future expansion remains a possibility

These advantages explain why many modern industrial, commercial, agricultural, and storage facilities utilize bolt-up systems.

Finding What’s Right for You

Choosing between a weld-up or bolt-up metal building requires balancing customization, construction speed, labor requirements, and overall project goals. Weld-up systems offer flexibility for specialized applications, while bolt-up systems provide engineered efficiency, predictable costs, and streamlined construction.

For many commercial, industrial, agricultural, and storage projects, bolt-up metal building kits deliver an attractive combination of performance and value. Evaluating your site’s requirements, timeline, and future growth plans can help determine which approach aligns best with your long-term objectives.

Understanding Load Requirements for Metal Building Kits

Understanding Load Requirements for Metal Building Kits

Every metal building kit must withstand forces that act on the structure throughout its lifespan. These forces, known as loads, influence nearly every aspect of building design, from the size of the framing members to the foundation requirements. Understanding load requirements helps property owners, developers, and contractors choose a building that delivers long-term performance and safety.

When a metal building design accounts for expected loads, the structure can resist environmental conditions, support intended operations, and comply with local building codes. Failing to consider these requirements can lead to structural issues, increased maintenance costs, and unnecessary project delays.

What Are Building Loads?

Building loads refer to the forces and weights that a structure must support. Engineers calculate these forces before finalizing the design of a metal building kit. Each load type affects the structure differently, so designers must evaluate all applicable conditions.

Load requirements vary based on location, building use, occupancy, and local code regulations. A warehouse in a northern climate faces different challenges than a manufacturing facility in a coastal region.

Understanding Dead Loads

Dead loads include the permanent weight of the building itself. These loads remain constant throughout the life of the structure.

Examples of dead loads include the steel framing, roof panels, wall panels, insulation systems, mechanical equipment, lighting systems, and permanently attached components. Engineers calculate dead loads first because they establish the baseline weight that the structure must continuously support.

Although dead loads remain relatively predictable, they still play a critical role in determining the size and strength of structural members.

How Live Loads Affect Metal Buildings

Live loads represent temporary or movable forces that act on a building. Unlike dead loads, live loads can change over time.

People, stored inventory, equipment, furniture, and movable machinery all contribute to live loads. Different building applications require different live load calculations. A storage facility often demands higher live load capacity than an office building because of the weight of stored materials.

Engineers use occupancy classifications and building code requirements to determine appropriate live load values for each project.

Understanding Load Requirements for Metal Building Kits

Why Roof Loads Require Special Attention

Roof loads deserve separate consideration because roofs encounter unique forces throughout the year. Snow accumulation, maintenance personnel, rooftop equipment, and temporary construction activities can all add weight to the roof system.

Designers must evaluate anticipated roof loads based on regional weather patterns and intended building use. Areas that experience heavy snowfall often require stronger roof systems than regions with mild winters.

Proper roof load calculations help prevent structural stress, excessive deflection, and potential damage during severe weather events.

Understanding Snow Load Requirements

Snow loads represent one of the most important environmental factors in many regions. Snow accumulation can place significant weight on a building’s roof.

Several factors influence snow load calculations, including:

  • Geographic location
  • Historical snowfall data
  • Roof slope
  • Building exposure
  • Wind patterns
  • Local building code requirements

Engineers analyze these variables to determine the appropriate snow load design value. Even areas that receive moderate snowfall can experience occasional storms that create substantial roof loading conditions.

How Wind Loads Impact Metal Building Kits

Wind creates both horizontal and uplift forces that affect metal buildings. High winds can push against walls while simultaneously lifting roof components.

Wind load requirements vary significantly based on location. Coastal regions, hurricane-prone areas, and open terrain environments often require higher design wind ratings than protected inland locations.

Engineers consider factors such as building height, exposure category, roof geometry, and local wind speed maps when calculating wind loads. Proper wind-resistant design helps protect the structure during severe weather events and supports long-term building performance.

The Role of Seismic Loads in Structural Design

Seismic loads result from ground movement during earthquakes. Although some regions experience minimal seismic activity, engineers must still evaluate seismic requirements based on local code provisions.

Seismic design focuses on allowing the structure to absorb and distribute energy without catastrophic failure. The building’s weight, configuration, occupancy type, and geographic location all influence seismic calculations.

Modern metal building systems often perform well in seismic applications because steel provides both strength and flexibility.

How Collateral Loads Influence Building Design

Collateral loads include additional non-structural items that hang from or attach to the building frame. These components may not form part of the primary structure, but they still add weight that engineers must account for during design.

Examples include sprinkler systems, suspended ceilings, lighting fixtures, ductwork, conveyors, and utility systems. When owners anticipate future additions, they should communicate those plans during the design phase.

Accurate collateral load calculations help ensure the building can support all intended systems without requiring costly structural modifications later.

How Building Codes Determine Load Requirements

Building codes establish minimum load requirements for structural safety. Local jurisdictions typically adopt versions of the International Building Code (IBC), which references standards developed by organizations such as the American Society of Civil Engineers (ASCE).

Code requirements address factors including wind speeds, snow loads, seismic design categories, occupancy classifications, and risk categories. Because codes vary by location, a building design suitable for one area may not meet requirements in another.

Working with an experienced metal building provider helps ensure compliance with all applicable regulations before construction begins.

The Importance of Site-Specific Load Analysis

No two building sites present identical conditions. Site-specific factors often influence load calculations and structural requirements.

Topography, elevation, surrounding structures, soil conditions, and exposure to environmental forces can all affect building performance. A structure located on open farmland may experience greater wind exposure than a similar building surrounded by other buildings.

Understanding Load Requirements for Metal Building Kits

Common Mistakes When Evaluating Load Requirements

Many building owners focus primarily on dimensions and cost while overlooking load considerations. This approach can create problems during design, permitting, or future operations.

One common mistake involves underestimating future equipment needs. Another involves failing to disclose planned rooftop units, crane systems, or storage requirements. Some owners also assume that standard designs automatically meet local code requirements.

Providing complete project information at the beginning of the design process allows engineers to create a building that meets both current and future needs.

How Load Requirements Affect Long-Term Building Performance

Load requirements influence far more than structural safety. They also affect durability, maintenance needs, operational efficiency, and lifecycle costs.

A properly engineered metal building can withstand environmental forces while maintaining structural integrity for decades. Accurate load calculations reduce the risk of premature wear, excessive deflection, and unexpected repairs.

Whether the project involves agricultural facilities, manufacturing plants, warehouses, or commercial steel buildings, understanding load requirements helps stakeholders make informed decisions throughout the planning process.

Choosing the Right Metal Building Kit

Selecting the right metal building kit starts with understanding the loads the structure must support. Dead loads, live loads, roof loads, snow loads, wind loads, seismic forces, collateral loads, and crane loads all contribute to the final design.

Each project presents unique challenges that require careful evaluation and engineering expertise. By addressing load requirements early in the planning process, building owners can improve safety, support operational goals, and maximize the value of their investment.

A metal building designed around accurate load calculations provides confidence that the structure can perform as intended under real-world conditions for many years to come.

Mistakes To Avoid When Installing Metal Building Kits

Mistakes To Avoid When Installing Metal Building Kits

Mistakes To Avoid When Installing Metal Building Kits

You ordered a metal building kit because you wanted a straightforward way to erect a sturdy structure for your needs, whether personal, commercial, or industrial. And though you can hire contractors to set up the building for you, that’s not necessary. If you’re attempting the installation yourself, we’re here to help. Read on to explore the mistakes many people make when installing metal building kits so that you can avoid them.

Before the Kit Arrives

First, let’s take a look at the errors that tend to happen before the kit even gets delivered.

Not Pulling Permits

Skipping the permit process is one of the most common mistakes people make, and it’s one of the costliest. Permits may be annoying, but they’re essential. They verify that your building meets local code requirements for load ratings, setbacks, and zoning. If you skip getting permits, you could face fines, mandatory teardowns, or a building you can’t legally occupy or sell. Check with your local permitting office before you start any work because requirements vary by municipality.

Not Preparing the Building Site

Your site needs to be ready before your kit arrives, not after. The ground where your building will sit needs to be cleared, leveled, and graded so that water drains away from the building perimeter. If there are soft ground areas or mud, gravel should be added to strengthen the area where the shipping truck and equipment will be unloaded. Additionally, if you’re planning for a concrete slab foundation, that must be poured and cured ahead of time.

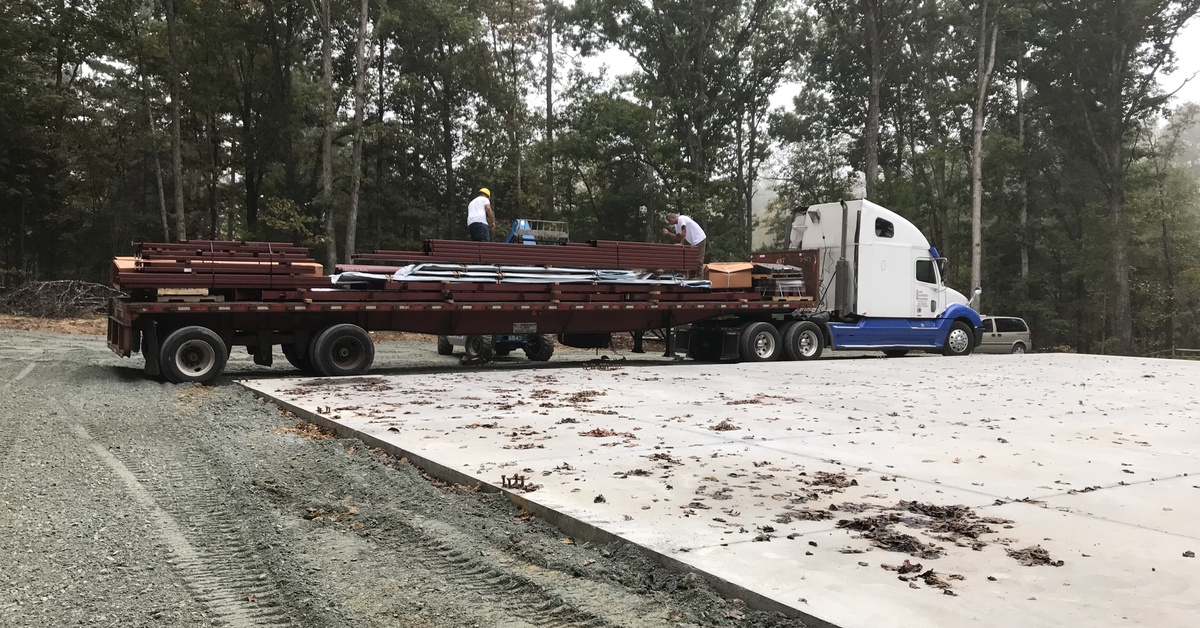
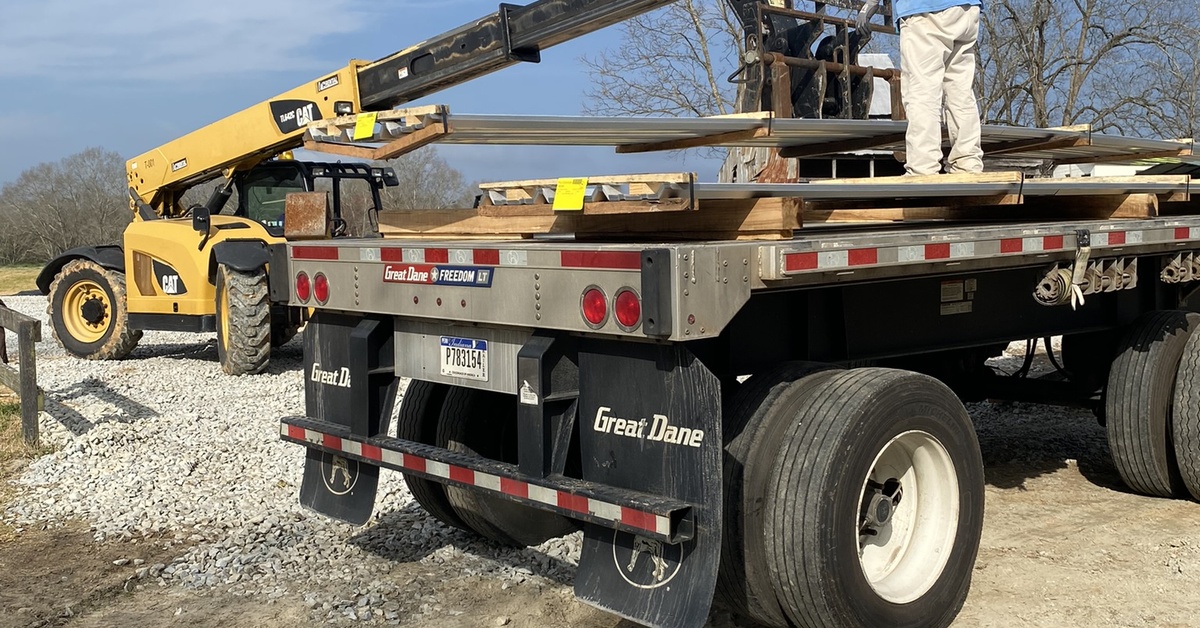
You’ll also need to make sure you have equipment on-site that can handle unloading. Metal building materials arrive on flatbed trucks, and you’ll need machinery capable of lifting up to 5,000 pounds to get everything off the truck safely.

Mistakes To Avoid When Installing Metal Building Kits

Miscalculating the Anchor Bolt Layout

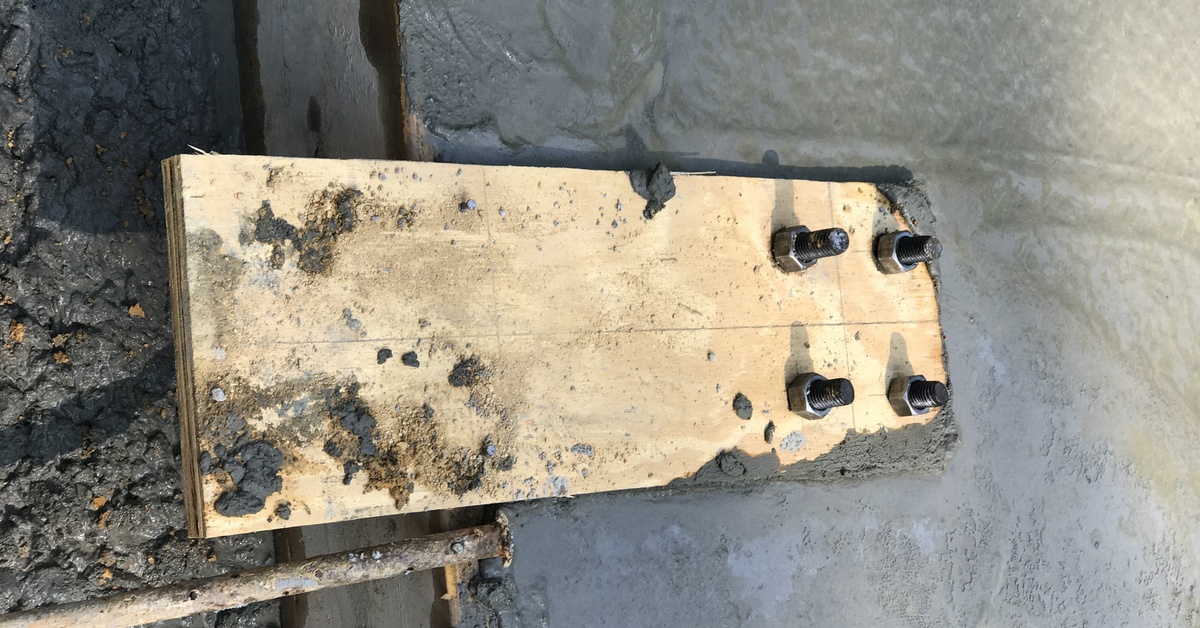
Anchor bolts are the threaded steel rods that get cast into your concrete slab and hold your building’s column base plates to the foundation. You must place these in your foundation precisely. If they’re off, your columns won’t sit correctly, and the entire frame alignment could be compromised.

Double-check the anchor bolt layout against your building’s stamped drawings before you pour the concrete, and verify again once it sets. Use a template if one is provided.

Frame Erection Mistakes

Mistakes with frame erection affect everything that gets attached to the frame afterward. Here’s what to avoid.

Rushing the Frame Without Temporary Bracing

Metal building frames are engineered to be rigid once fully assembled, but during erection, individual frames have no lateral stability on their own. Therefore, you need temporary bracing cables or rods in place as you set each frame. Without them, a strong gust of wind or an unbalanced load can cause a frame to tip or collapse before the rest of the structure is in place to stabilize it.

Ignoring Leveling as You Go

One of the most common frame mistakes is erecting columns that aren’t plumb and then trying to compensate later with the roof members or wall girts. But you can’t fix a frame that’s out of plumb by adjusting secondary members. The only way to get a straight, properly loaded building is to check each column for plumb with a level or transit as you go. Check your diagonal measurements across each bay to confirm the frame is square. Small errors at the frame stage multiply by the time you’re installing panels, so take your time here.

Panel and Roofing Mistakes

Once your frame is up, you can choose to add insulation and once it is installed, you can move on to installing the panels and roof, being mindful of the following.

Mistakes To Avoid When Installing Metal Building Kits

Not Aligning Roof Panels Before You Start Screwing

Roof panel installation goes wrong when people start at one end and work across without checking alignment periodically. PBR roof panels have interlocking ribs, and if the first panel goes on out of square, each subsequent panel compounds the error. So snap a chalk line perpendicular to the ridge before you start, and check your alignment every few panels.

Overdriving or Underdriving Roofing Screws

The screws that fasten your roof panels create the weather seal at each fastener location. Each screw has a neoprene washer under the head that compresses against the panel to create a watertight seal. If you overdrive the screw, the washer deforms and creates gaps that let water in. If you underdrive it, the washer doesn’t seat fully, and you get the same result. The correct torque leaves the washer compressed just enough to flatten out flush with the panel surface without bulging or splitting.

Installing Trim and Flashing in the Wrong Order

Trim and flashing pieces have an installation sequence, and it matters. If you install your rake trim before your eave trim, for example, you may not be able to get the eave trim to seat correctly, or you’ll end up with gaps in the overlap that create water infiltration points.

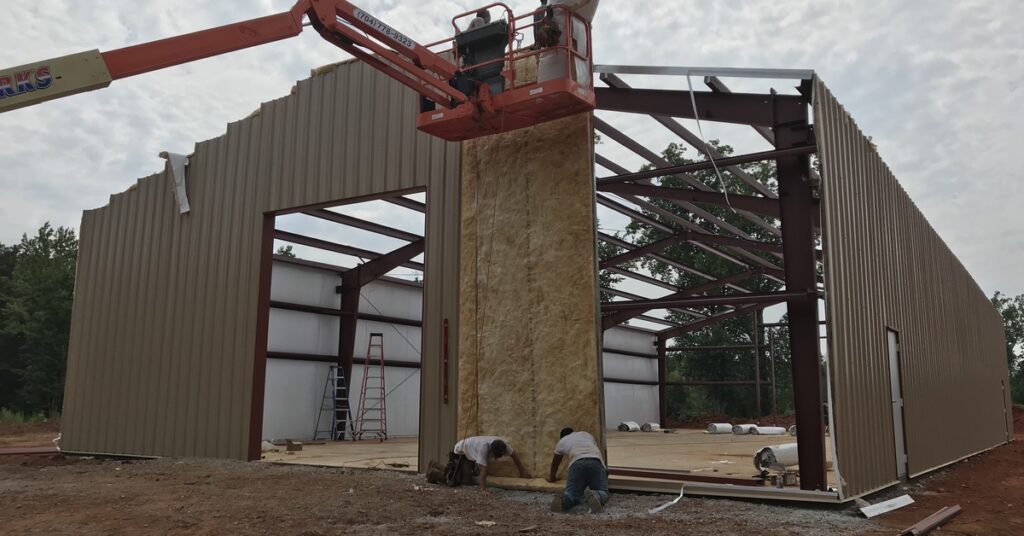
Installing Insulation Before Panels

Insulation is your defense against condensation, which forms when warm interior air contacts cold steel. It’s very important to note that the time to add insulation is during erection, before the wall panels go on. Trying to retrofit insulation after the panels are on is difficult and can result in inconsistent coverage. Instead, install your fiberglass batt over the girts before the wall panels are set. Trust us—you’ll thank us later on this one.

Get the Installation Done Right

Installing metal building kits correctly is mostly a matter of being prepared and following your erection manual exactly. By avoiding the mistakes we outlined in this blog, you’ll be on the path toward a seamless, successful build.

At Arco Building Systems, we care about your experience. We can put you in touch with building erectors in your area if you don’t even want to deal with the installation yourself, and we offer plenty of resources for our DIY builders. If you’ve got questions about your specific kit or want to make sure you’ve got what you need before you start, we’re here to help. Our steel building kits have been engineered and refined over more than 45 years, and every kit comes with stamped drawings and an assigned customer service specialist. Whether you’re a first-time builder or you’ve done this before, you won’t be figuring it out alone if you partner with Arco.

Why Pre-Engineered Kits Are the Future of Construction

Why Pre-Engineered Kits Are the Future of Construction

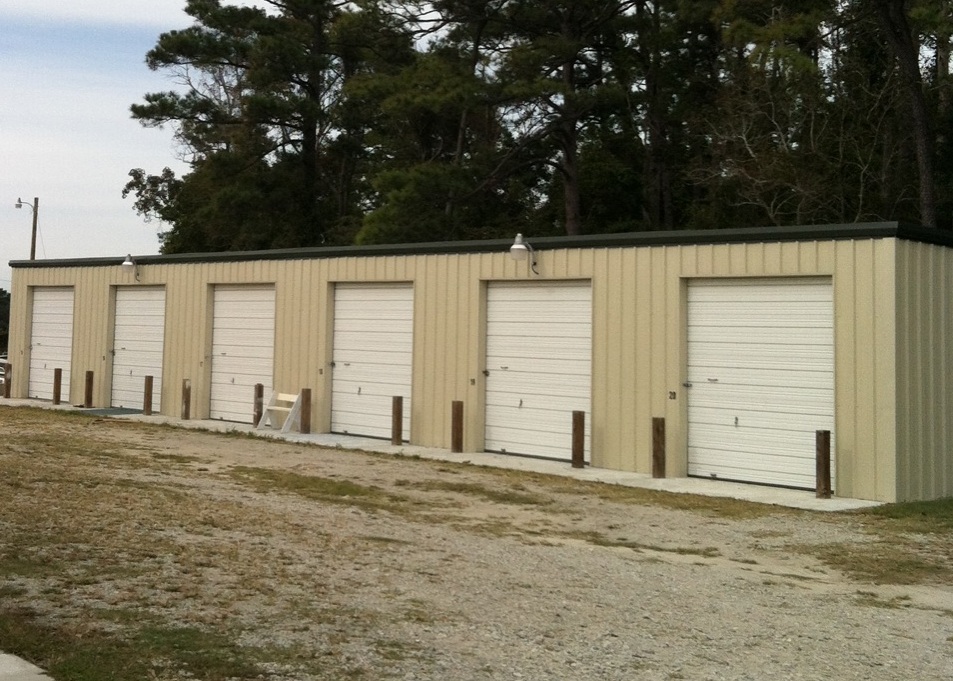
Versatile steel storage building featuring multiple roll-up units, offering secure, cost-effective space solutions for personal storage, equipment, vehicles, and business inventory.

Whether you’re a seasoned contractor or someone tackling your first major build, you’ve probably encountered kit-based construction. This unique method is a viable replacement for traditional construction in many niches, including warehousing, manufacturing, retail, storage, aviation, and much more. In fact, pre-engineered kits are the future of construction in these niches, and we’re here to explore why.

What Pre-Engineered Means

A pre-engineered building kit is a structure designed and manufactured off-site as a complete system. The vast majority of these systems are made of steel.

The manufacturer engineers the building framing, roof panels, wall panels, fasteners, and trim all together, meaning you don’t have to separately source and combine these pieces on-site. The kit arrives at your jobsite ready for assembly.

The Old Way’s Limitations

Traditional construction depends on a long chain of decisions and third-party partners. You must hire a design team, source materials, coordinate deliveries, manage tradespeople, and hope everything lines up. If it doesn’t—and something usually goes wrong—you pay for it in delays and cost overruns.

That process isn’t efficient. It spreads accountability across too many people and too many moving parts. And though you cannot avoid this process for certain types of construction (such as residential builds), pre-engineered kits are an alternative for many applications.

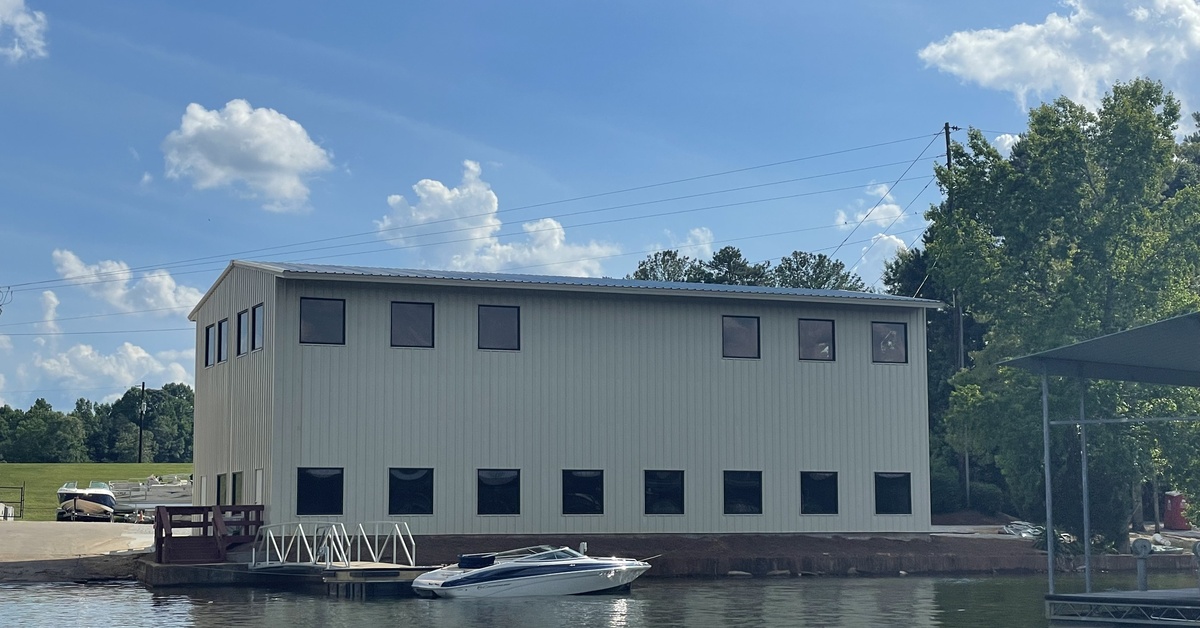
Custom-engineered steel building designed for waterfront and marine applications, providing expansive storage, workshop, and recreational space with durable, low-maintenance construction.

Why Pre-Engineered Kits Are the Future

Now, let’s dive into the nitty-gritty of why pre-engineered kits are the future of construction in niches such as agriculture, manufacturing, logistics, aviation, retail, ship handling, fitness, and many others.

Speed

Construction timelines are notoriously hard to hit. Material lead times, weather, subcontractor scheduling, and supply chain hiccups can all eat into your schedule. Pre-engineered kits cut through a lot of that.

Because the system ships as a package, you don’t have to wait on 12 separate material deliveries. You get everything you need in one go.

And because the components are pre-cut and pre-drilled, field assembly moves faster than conventional framing. Faster assembly means less time exposed to weather delays and cost creep.

Cost Predictability

Speaking of cost creep, one of the frustrating parts of traditional construction is how much the final cost can drift from the original estimate. Something unexpected—and expensive—almost always comes up.

Pre-engineered kits give you a fixed scope from the start. You know what you’re ordering, you know what it costs, and you know how it goes together. That predictability makes budgeting far more predictable.

This doesn’t mean pre-engineered kits are automatically cheaper than site-built alternatives in every situation. What it means is that you have better information going in.

Excellent Structural Performance

Some people worry that a kit-based system is a compromise on structural integrity. It’s not. Pre-engineered steel structures are engineered to meet and often exceed local building codes and load requirements, just like any custom-built structure.

Plus, steel’s strength-to-weight ratio is hard to beat. Pre-engineered steel buildings handle snow loads, wind loads, and seismic requirements excellently.

Application Flexibility

Pre-engineered kits aren’t limited to one type of project. That’s one of the reasons the technology has expanded so quickly across so many industries.

Here’s a short list of what people use these systems for most often:

  • agricultural buildings, including barns, equipment storage, and livestock facilities
  • commercial warehouses and distribution centers
  • retail storefronts
  • industrial facilities
  • garages, workshops, and hobby structures
  • self-storage complexes
  • aircraft hangars
  • maintenance facilities
  • recreational buildings like gyms and community centers

The same core system adapts across all of these project types by adjusting dimensions and custom features. That means everyone using a kit for their building needs, whatever they are, is working from a proven platform, not starting from scratch every time.

DIY-Friendliness

If you’re not a professional contractor, pre-engineered kits offer something that traditional construction rarely does: a clear path from order to finished building without requiring advanced construction knowledge.

The parts are labeled. The connections are engineered in advance, so you won’t have to make structural decisions on the fly.

That said, you still need to be realistic about what you’re taking on. A larger structure with a complex foundation will still need professional input on some aspects, especially when it comes to site prep and permitting. But the kit itself removes a lot of the technical complexity that would otherwise require a specialist.

For the ambitious DIYer who’s done their homework, a pre-engineered kit is one of the most achievable paths to a large, durable structure.

Simplified Permitting and Code Compliance

Every new structure requires permitting, and that can be a tedious process. Specifically, getting a permit for a new structure requires engineering stamps that certify compliance with local building codes. Pre-engineered systems simplify this process because most reputable kit suppliers provide stamped engineering drawings that local building departments can review. You don’t have to hire a separate engineer to design the structure from scratch; just present a system that’s already been engineered and tested.

This doesn’t mean permitting is automatic. Local requirements vary, and you’ll still need to work with your local authority on site-specific issues like foundation design and zoning. But the structural engineering portion of your permit package is handled, which removes one of the more expensive and time-consuming parts of the process. Nonetheless, the end user is responsible for verifying all codes and loads with their local authority.

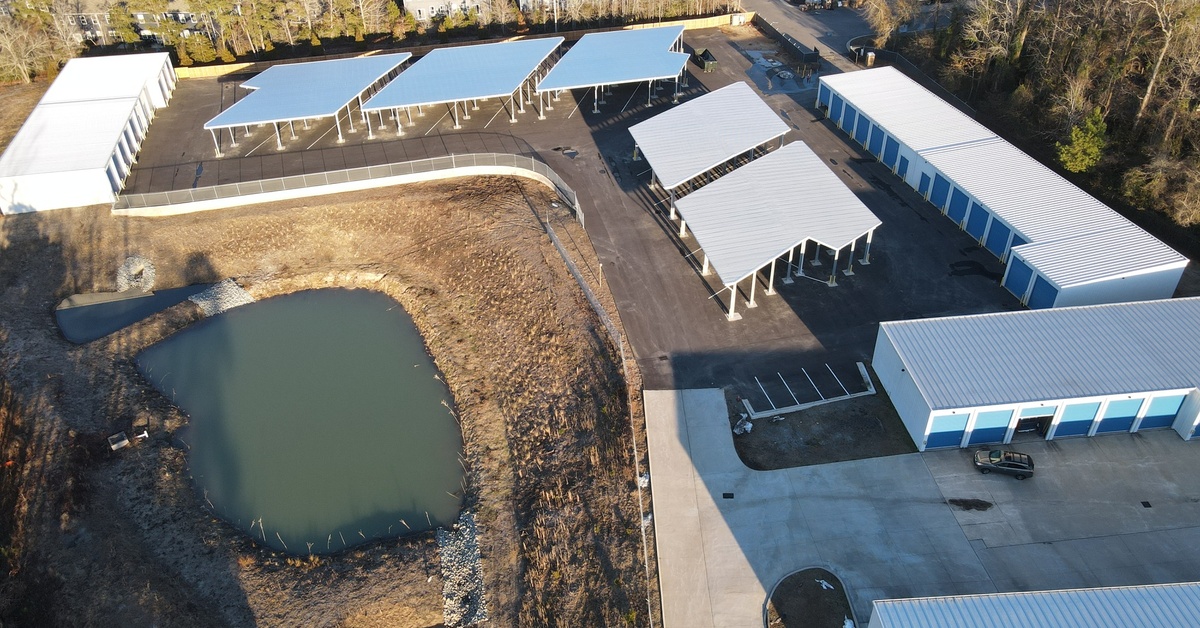
Large-scale storage facility combining enclosed units and covered vehicle parking structures, delivering flexible protection for RVs, boats, automobiles, and commercial equipment.

What To Look For in a Quality Kit Supplier

Not all pre-engineered kits are created equal. Before you commit to a supplier, there are a few things worth checking closely:

  • Engineering documentation: Does the supplier provide stamped drawings from licensed engineers? If not, that’s a red flag.
  • Material quality: Confirm the steel grade and coating specifications. Higher-quality galvanizing and paint systems extend the life of the structure significantly.
  • Component labeling: A well-organized kit has every part labeled and matched to the assembly manual. Sloppy labeling will be a headache in the field.
  • Customer support: Can you reach a knowledgeable person when you have a question during assembly? You will use and be grateful for that support.
  • Lead times: Understand how long it takes from order to delivery. Factor that into your project schedule, especially for time-sensitive builds.

A supplier who handles all of these things well is worth paying a little more for. The kit is only as good as the company standing behind it.

Partner With Arco

The pre-engineered building kits available today cover more ground than most buyers expect. From straightforward garages and workshops to large commercial facilities, there’s a system designed for what you’re building.

At Arco Steel, we’ve helped countless contractors and property owners find the right solution for their specific project, such as our self-storage unit kits for investors entering the storage market. Reach out to our team, and we’ll walk you through your options.

Why Red Iron Kits Are Perfect for DIY Builders

Why Red Iron Kits Are Perfect for DIY Builders

Why Red Iron Kits Are Perfect for DIY Builders

You’ve got the land, the drive, and the skills to build a large structure, whether for industrial, commercial, agricultural, or residential purposes. You’ve contemplated designing and sourcing your materials from scratch, but you know how big and tedious of a job that can be. Instead, you’re interested in getting a building kit. These packages come with all the parts and expertly fabricated materials you need to construct a building. But there are several types of these kits, ranging from generic builder-grade options to the highest-quality, custom packages based on a design you make.

At Arco, we are a top supplier of custom red iron building kits, and we’re here to discuss why these are perfect for DIY builders like yourself.

Why Red Iron Kits Are Perfect for DIY Builders

What Red Iron Is and Why DIYers Love It

Red iron refers to the hot-rolled structural steel used to fabricate the primary frames of a steel building. The name comes from the red oxide primer applied to the steel after fabrication, which protects it during shipping and storage before you put it up. That primer isn’t decorative, though it does look nice. Mostly, it’s a functional rust barrier that protects your investment between delivery and erection day. That means you don’t need to own a climate-controlled warehouse to keep your kit’s components in good shape before erection.

The structural members in red iron kits are steel columns, rafters, and beams that are cut and welded to precise dimensions. That welded construction produces a strong, dimensionally consistent frame. For a DIY build where structural integrity depends on your work, hot-rolled red iron gives you a capable and predictable starting point.

Pre-Engineered Components Mean Fewer Surprises on Site

The biggest advantage of a red iron kit for a DIY builder isn’t the material itself—it’s the fact that every component arrives pre-engineered and pre-punched for your specific building. Every bolt hole is already there, and every piece is already cut to length. That means you won’t have to fabricate anything on-site but simply assemble.

The anchor bolt drawings that come with your kit tell you exactly where each column base needs to land on your concrete slab. So all you really need to do on your own is get your foundation work correct. Once your concrete slab is cured and you’ve set your anchor bolts to spec, the frame can go up quickly.

Clear-Span Frames Simplify the Assembly Process

Red iron kits are available in clear-span configurations, which means the exterior frame supports the roof entirely with no assistance from interior columns that get in the way. That’s a huge space-saving, functional benefit for the building’s design, and for a DIY builder, it’s also an erection benefit. This is because you won’t have to coordinate around interior obstructions or deal with the added complexity of interior column bases and connections.

Clear-span frames are available in widths from 20 to 120 feet, so whether you’re putting up a 30-foot personal workshop or an 80-foot equipment storage building, the structural system works the same way. The assembly logic stays consistent regardless of scale, which makes it easier to plan your crew, your equipment rental, and your timeline before the truck ever shows up.

Bracing and Secondary Framing Are Already Designed In

A spot where DIY builders sometimes run into problems is secondary framing, which includes the purlins, girts, and bracing that complete the structural system between your primary frames. Purlins run horizontally across the roof and give your panels something solid to fasten to. Girts do the same thing on the walls. In a kit, both arrive as pre-cut C or Z sections that bolt directly to the primary frame with standard hardware.

As for bracing, an Arco building can include various forms like portal frame, wind column, rod or cable bracing as a standard feature, already sized for your building’s dimensions. You don’t have to source it separately, and you don’t have to make engineering decisions about it. It’s in the kit, and the drawings tell you where it goes.

Engineered Plans Streamline the Permitting Side

Pulling permits on a structure like this requires stamped, engineer-certified drawings in most jurisdictions. With a red iron kit, those plans come with the package. In an Arco kit, you receive a digitally sealed PDF with building plans and anchor bolt drawings, and hard copies of documents if requested too. All files stamped and certified by an engineer licensed in your state.

This feature is incredibly practical because getting your structure engineered to local code requirements is one of the biggest administrative hurdles DIY builders face. When you can streamline the process like this, it keeps you from getting halfway through a project only to find out your drawings don’t meet local requirements.

Why Red Iron Kits Are Perfect for DIY Builders

The Panel System Is Designed for Field Installation

Once your framing is up and square, panel installation is where the building comes together. If insulation has been purchased, this should be installed before the roof and wall panels are installed. And again, a red iron kit makes this step easy. PBR (purlin bearing rib) panels are the standard wall and roof covering included with Arco kits. The 26-gauge PBR panel has deep major ribs for structural strength, minor reinforcing ribs between them, and a bearing leg at the base of each rib that resists damage during installation. That’s important when you’re walking the roof yourself.

You can install panels in a consistent lap-and-fasten sequence from one end of the building to the other. The self-drilling, self-tapping ZAC (zinc-aluminum capped) fasteners included with every Arco building are color-matched to your panels and carry a manufacturer’s guarantee against rusting. Furthermore, each one includes a neoprene washer that creates a weather-tight seal at every fastener point. By having all these high-quality, perfectly compatible pieces on hand, you can avoid making decisions about fastener types on the fly.

Make Your Build Count

So there you have it—red iron kits, particularly those that Arco supplies, are perfect for DIY builders. If these kits sound like something you’re interested in, then get in touch. We work directly with DIY builders to configure a design that fits your site footprint, local code requirements, budget, and more. Additionally, we can supply kits for a wide range of structures, from agricultural buildings to self-storage facilities. Reach out to us today to get your project moving.

What To Expect When Your Metal Building Kit Arrives

What To Expect When Your Metal Building Kit Arrives

What To Expect When Your Metal Building Kit Arrives

You’ve done the hard part. You got the permits, figured out your specs, signed the paperwork, and put down your deposit. Now your metal building kit is on its way, and you’re probably wondering what happens next. The delivery and receiving process for Arco buildings is straightforward, as we aim to make everything clear and painless for our customers. That’s why we’ve put together this guide on what to expect when your metal building kit arrives and how you can prepare with these expectations in mind.

Your Site Must Be Ready Before the Truck Shows Up

The most common mistake people make is waiting until delivery day to think about site prep. Don’t do that. Your building materials are heavy, and you shouldn’t make the delivery driver wait around while you figure out where everything should go.

You need a clear, level area where the truck can pull in, drop the load, and pull out without any obstacles. Make sure there’s enough room for a large commercial vehicle to maneuver. Overhead obstructions like low-hanging branches or power lines are concerns here, so walk the path ahead of time and clear anything that could interfere.

Your site should also be dry and firm enough to support the weight of the materials. Soft, muddy ground can cause pallets to sink, which makes unloading dangerous and damages the materials.

The Unloading Process Depends on Who’s Erecting the Building

Once the truck arrives and parks in a clear, stable area, it will be time to unload the building materials. Who does this job depends on who’s erecting the building.

By an Arco-Referred Erection Crew

If you’ve arranged for an Arco-referred erection crew and your concrete is poured and cured by the time the shipment arrives, the crew will take care of unloading. You won’t need any special tools or equipment.

By Yourself

You might opt to erect the building yourself, in which case you’ll need to prepare. You’ll need equipment capable of lifting up to 5,000 pounds to unload your metal building materials.

Additionally, even if you arranged for an erection crew to do the work but your concrete foundation isn’t ready when they arrive, you often pay a fee to unload-only. This is an additional fee not included in the original labor price that is incurred if the concrete pad is not ready. The concrete must be poured and cured for this third party to proceed. If you anticipate this possibly being the case, make sure you have lifting equipment ready to go.

You Can and Should Inspect Parts as They Come Off the Truck

At Arco, when we coordinate the delivery of a building kit package we encourage customers to always check for missing or damaged parts. Since accidents can happen during transportation, it’s a good idea to inspect the building parts as you unload them to report any missing or damaged materials within 7 days of arrival. Check to make sure you received everything in your kit and that each part is in good shape. Here are the main things to check for (but always use your quote as a reference):

  • structural steel framing members
  • roof and wall panels
  • trim pieces and fasteners
  • doors, windows, and any other accessories you ordered
  • anchor bolt drawings and permit drawings

If anything appears damaged or missing, reach out. We will make it right.

Reviewing Your Drawings Is the Next Step

Once everything is unloaded and looks ready for construction, your next job is to review your anchor bolt drawings. Your kit includes stamped anchor bolt drawings and permit drawings, which tell your crew exactly where the anchor bolts need to be placed relative to the foundation. This is the first step in erection, so it pays to do it well. Of course, if you hired an erection crew, they will take care of this.

What To Expect When Your Metal Building Kit Arrives

There’s an Order in Which Construction Should Happen

Even if you’re not building the structure yourself, understanding the sequence of construction can help you manage the project and catch problems before they compound.

The general order goes like this:

  1. Concrete foundation & anchor bolt placement: As mentioned, this must be done before the building kit arrives. Though you can install the anchor bolts with epoxy after the foundation cures, installing them in the concrete is recommended.
  2. Steel frame erection: The rigid frames go up first, followed by the endwall framing.
  3. Insulation installation: If you ordered insulation with your metal building kit, that will get installed after the primary and secondary framing go up.
  4. Roof panel installation: Panels go on after the frame is fully braced and insulation is installed.
  5. Wall panel installation: Sidewalls and endwalls get paneled out.
  6. Trim, door, and window installation: These go in during the final stages of the shell.

Each phase has to be complete before the next one starts. Rushing the sequence or skipping steps could create structural problems that are difficult and expensive to fix after the fact.

Documentation Organization Is Important

Between your anchor bolt drawings, permit drawings, order confirmation, delivery receipt, and any foundation plans, you’ll accumulate a hefty stack of project documents. All of them are important, so keep them organized and on-site throughout the construction process.

Your local building department may require inspections at multiple stages of construction, and inspectors will want to see the stamped drawings. If you can’t produce them on demand, then you might suffer delays that push your completion date back and affect any contractors or tenants waiting on you.

The Last Step Is a Final Walkthrough

Once your erection crew has completed the building, do a thorough walkthrough before you sign off on the project. Arco wants you to be 100 percent satisfied with your building, and we will provide support if you encounter issues, even if we weren’t involved with them. Here’s what we suggest checking:

  • panel seams
  • trim installation
  • door hardware
  • window frames
  • fastener seating
  • all meeting points for gaps

If you catch installation issues while the crew is still on-site, it’s usually easy and quick to correct them.

What To Expect When Your Metal Building Kit Arrives

Make the Most of Your New Building

Whether you ordered a commercial shop, an agricultural structure, an aircraft hangar, a self-storage building kit, or something else entirely, your Arco steel building is designed to give you decades of reliable service. The investment you made in quality materials and American steel manufacturing is built into every component we ship, which all shows up on that delivery truck.

We hope this guide to what to expect helps you prepare for when your metal building kit arrives. And always remember that the Arco team is here to support you. If you have questions at any point in this process, you can reach us at 1-800-241-8339.

Top Questions To Ask Before Ordering a Metal Building Kit

Top Questions To Ask Before Ordering a Metal Building Kit​

Top Questions To Ask Before Ordering a Metal Building Kit​

If you’re thinking about ordering a metal building kit, you’re probably excited about getting a durable, customizable structure at a fraction of the cost of traditional construction. But walking into the process without knowing what you need to figure out first can lead to costly surprises. There are questions you need to answer for yourself before you ever call a supplier, and then there are questions you need to ask your supplier before you put down a dime. Here’s your full rundown of the top questions to ask before ordering a metal building kit.

Questions To Ask Yourself First

A supplier can help you design and specify a building, but they can’t tell you what your goals are or what your property allows. So before you contact anyone, ask yourself the following questions.

Top Questions To Ask Before Ordering a Metal Building Kit​

What Do I Need the Building For?

Metal building kits serve an enormous range of purposes: agricultural storage, commercial operations, auto shops, aircraft hangars, churches, gyms, mini storage facilities, and more. The intended use determines the structural design requirements, the size and placement of openings, whether human occupancy is involved, and what local code compliance looks like. So get completely clear on the purpose before you move to anything else.

What Local Codes and Permits Apply?

Every county and municipality has its own building codes, and your metal building has to meet them. Don’t assume your supplier will handle this for you. Contact your local building department and find out what’s required for a structure of the type and size you’re planning.

You need to know whether a permit is required, what wind and snow load ratings apply to your area, and whether there are zoning restrictions on your property. Some jurisdictions require a licensed engineer to stamp the drawings before they issue a permit. Your building kit needs to be engineered to those specific specs, so get this information before you place an order.

What Are the Exact Dimensions I Need?

Don’t guess on size. Measure the footprint you have available, and then think carefully about your actual clearance requirements. You need to know not just the width and length of the building but the height. If you’re parking vehicles inside, you need enough vertical clearance. If you’re storing equipment, you need openings large enough for it to pass through.

Also, think about what you might need two or three years from now. Building bigger upfront costs less than adding on later, and a lot of buyers end up wishing they’d gone larger the first time.

What Foundation Do I Need?

Most metal buildings require a concrete slab with anchor bolts set to match the building’s column placement. Talk to a local concrete contractor who knows your soil conditions, and understand what the foundation requirements are for your specific building.

Do I Have a Plan for Erection?

Ordering a metal building kit means you’re getting the components, not a finished building. Someone has to erect it. Whether you’re planning to hire a professional crew or coordinate your own labor, you need to have this figured out before your kit arrives.

You also need to know what equipment is on site. Metal building materials arrive on flatbed trucks, and you’ll need equipment capable of lifting up to 5,000 pounds to unload them.

Questions To Ask Your Supplier

Once you’ve got your own answers lined up, it’s time to talk to suppliers. These are the questions that will reveal whether a supplier knows what they’re doing and whether their kit is worth what they’re charging.

Top Questions To Ask Before Ordering a Metal Building Kit

What’s Included in the Kit?

Metal building kits can vary widely in what they contain. Some kits come with everything you need: structural framing, roof and wall panels, trim, fasteners, anchor bolt drawings, and erection documents. Others include only the bare structural components and leave you to source accessories separately. So ask for a complete, itemized list of what’s included and make sure you can work with it.

What Panel Gauge and Steel Grade Are You Using?

The quality of the steel in your roof and wall panels makes a major difference in how your building holds up. Ask your supplier exactly what gauge they use for the panels and what the strength rating is.

26-gauge, 80 KSI PBR panels are a strong industry standard for weather resistance and durability. If a supplier is vague about gauge or strength, that’s a red flag.

What Do the Fasteners Look Like?

Ask specifically what type of fasteners the kit includes. High-quality kits use premium fasteners with a zinc-aluminum cap (ZAC) finish that’s matched to the panel color and guaranteed not to rust. You should also ask whether washers are included.

What’s the Warranty Coverage?

Ask about what type of warranties are offered before you buy, and read it. You want warranty coverage on both the structural components and the painted panel surfaces.

If there is no warranty (or if the warranty language is vague), treat that as a warning. A reputable supplier stands behind their product with specific, documented terms that offer the customer peace of mind.

What Are the Engineering and Certification Standards?

Your building should be manufactured at an IAS-certified facility and meet MBMA (Metal Building Manufacturers Association) standards. Ask your supplier to confirm this.

You should also ask whether the building plans will be stamped and certified by an engineer who is licensed in your state, and how many copies of those plans you’ll receive. State-certified engineering drawings are what your local building department is going to require, and they’re what protect you if there’s ever a question about structural compliance.

What Is the Lead Time and Delivery Process?

Most metal building kits are custom-manufactured to your specifications, which means there’s a production lead time before your kit ships. Ask how long that is. Lead times vary based on the supplier, the size of the order, and current demand, so get a specific timeframe.

Additionally, ask how delivery works. Your kit will ship via flatbed truck, and you’ll need to plan for unloading on your end. Find out who is responsible for any damage that occurs in transit, and confirm whether you need to have your concrete pad ready at the time of delivery.

How Long Have You Been in Business?

Experience matters in this industry. Ask how long the company has been manufacturing and selling metal building kits. Ask whether they have a portfolio of completed projects that match your building type, and ask for references you can contact directly.

A supplier with decades of experience and a verifiable track record gives you confidence that the company will be there to support you if anything comes up during the process. Customer service from order placement through project completion is a sign of a supplier that takes their work—not just the sale—seriously.

Get the Right Building the First Time

At Arco Steel, we’ve spent over 45 years helping customers order the right building for their specific needs, and we walk every customer through this process with a dedicated specialist from start to finish. We encourage you to ask these top questions before ordering a metal building kit because we want to make sure your purchase goes right the first time. Whether you need an agricultural facility, a commercial structure, or a steel church building, get started by reaching out today for a free quote.

Easy Steps To Maintain Your Commercial Metal Building

Easy Steps To Maintain Your Commercial Metal Building

Easy Steps To Maintain Your Commercial Metal Building

You made a smart investment when you chose a metal building for your business. Steel is built to last for decades. But even the lowest-maintenance structures still require some upkeep. If you want your commercial metal building to stay in top condition and maintain its value for the long haul, here’s a list of easy steps to follow.

Key Takeaways

  • Inspect your commercial metal building at least once a year and after severe weather.
  • Keep the roof and gutters clear to prevent standing water, leaks, and corrosion.
  • Tighten loose fasteners and replace worn sealant around roof penetrations to maintain a watertight seal.
  • Repair scratches and rust spots quickly to protect metal panels from corrosion.
  • Maintain the seals on doors and windows to block out moisture, drafts, and pests.
  • Improve drainage around the foundation to prevent erosion and panel corrosion.
  • Check insulation and ventilation to reduce interior condensation.

Put a Routine Inspection Schedule in Place

You don’t need to inspect every square inch of your building every week, but you do need to complete at least one thorough inspection every year. A biannual schedule is even better, and it should also entail quick walkthroughs after any severe weather event.

During your inspections, you’re looking for anything that’s damaged or out of place, such as the following:

  • rust spots
  • standing water
  • dents
  • gaps in the sealant
  • loose fasteners
  • accumulated debris

Catching these things early might mean the difference between a five-minute fix and a multi-thousand-dollar repair.

Easy Steps To Maintain Your Commercial Metal Building

Mind the Roof

Your roof takes the brunt of everything the weather throws at it, which makes it your building’s most important line of defense.

Clear Debris

The biggest risk factor for a roof is natural debris (like leaves and dirt) accumulating on top and trapping moisture against the panels, as this encourages corrosion. After storms, clear off any accumulated debris as soon as it’s safe to do so. And if you’ve got gutters and downspouts on your building, check them at least twice a year and clear out any blockages. Clogged gutters force water to pool along the roofline, and that pooled water can work its way into seams and around fasteners. A clean, free-draining roof stays dry, and a dry roof lasts longer.

Tighten Fasteners

Roof fasteners can back out over time due to thermal expansion and contraction. If you notice any fasteners that look raised or loose during your inspections, re-tighten them. Replace any corroded fasteners.

Redo Sealant

The sealant around penetrations like HVAC units, skylights, vents, and pipe boots also breaks down with age. Run your hand along these areas and use a flashlight to look for cracking or shrinking, which shows up as gaps between the sealant and the roof. If necessary, re-caulk degraded portions.

Protect the Exterior Panels From Corrosion

The steel panels made for modern metal buildings come with factory-applied coatings that protect against corrosion, but those coatings aren’t invincible. Any scratches can expose the underlying steel, which then becomes a point of vulnerability.

Buy a touch-up kit that matches your building’s finish, and use it promptly on any damaged areas to keep the underlying steel sealed off from moisture.

If you spot a rust stain on your panels, don’t assume it’s coming from the panels themselves. In many cases, rust staining on metal buildings comes from a nearby source, like a metal roof vent or a rusting piece of equipment stored against the wall. Identify the source first, then treat the panel.

For corrosion on the panels themselves, wire-brush the affected area down to clean metal, apply a rust-inhibiting primer, and then re-coat with a compatible exterior paint. Doing this at the first sign of rust stops it from spreading beneath the panel coating, where it becomes much harder to address.

Inspect and Maintain Doors and Windows

A door or window that doesn’t seal properly lets in moisture, drafts, and pests. Therefore, you want to check all door hardware, including hinges, latches, rollers, and tracks, on a regular basis. Lubricate moving parts with a silicone-based lubricant at least once a year.

Additionally, check the weatherstripping around all entry doors and replace it when it no longer creates a tight seal. Gaps here let in moisture and increase your heating and cooling costs.

Easy Steps To Maintain Your Commercial Metal Building

Manage Water and Drainage Around the Foundation

Water that pools near your foundation is one of the most damaging things your building can face. Given enough time, standing water works into the base angle of your building, which accelerates corrosion at the base of the panels and can cause settling or erosion of the concrete slab.

Evaluate the Land’s Grading

After a heavy rain, take a walk around the perimeter of your building and check for spots where water is collecting. The ground around your building should slope away from the foundation at a rate of at least 6 inches over 10 feet. If you’ve got areas where water is running toward the building, you’ll want to re-grade the soil or add drainage solutions like French drains or swales.

Keep Vegetation Under Control

You should also keep vegetation trimmed back from the building’s base. Shrubs and overgrown grass can hold moisture against the panels and foundation, and the roots of hardy plants can eventually crack your concrete slab.

Keep Insulation in Good Shape

Good insulation does two things for your commercial metal building: It keeps your interior temperature stable, and it prevents condensation from forming on the interior surface of your panels.

Condensation is one of the sneakiest sources of corrosion in metal buildings because it builds up on the inside where you can’t easily see it.

Check your insulation annually for any signs of compression or gaps that have opened up along the edges. If you’re noticing condensation on the interior walls or ceiling, that’s a sign that your insulation has a gap or that it’s simply no longer performing as it should. Address it before the moisture problem compounds into a corrosion issue.

Evaluate Ventilation

Your building’s interior can generate moisture from everyday operations, whether that’s from equipment, humidity from workers, cooking, or any other process that releases steam or water vapor. If that moisture doesn’t have a way to escape, it condenses on the steel frame and panels.

So make sure your building has adequate ventilation for the activities happening inside it. Ridge vents, louvers, and exhaust fans all move humid air out of the building and replace it with drier outside air. If your operation has changed since the building was first installed, you may need to re-evaluate whether your ventilation is still adequate for the current use.

Stay on Top of Pest Control

Steel buildings are much, much less vulnerable to pests than wooden structures are, but desperate critters will try to hole up almost anywhere.

Seal any gaps you find around penetrations and main entry points. Check the condition of all door bottom seals. And if you’re seeing signs of pest activity inside your building, call a licensed pest control professional.

You’ve Got Everything You Need to Protect Your Investment

Stay on top of these easy steps, and you should be able to maintain your commercial metal building for the long haul. The buildings that last the longest are the ones owned by people who stay on top of the basics.

At Arco, our commercial metal buildings are built with long-term durability in mind from day one. Contact us to inquire about a new prefabricated red iron steel structure for your operations or get advice for maintaining the one you already own.